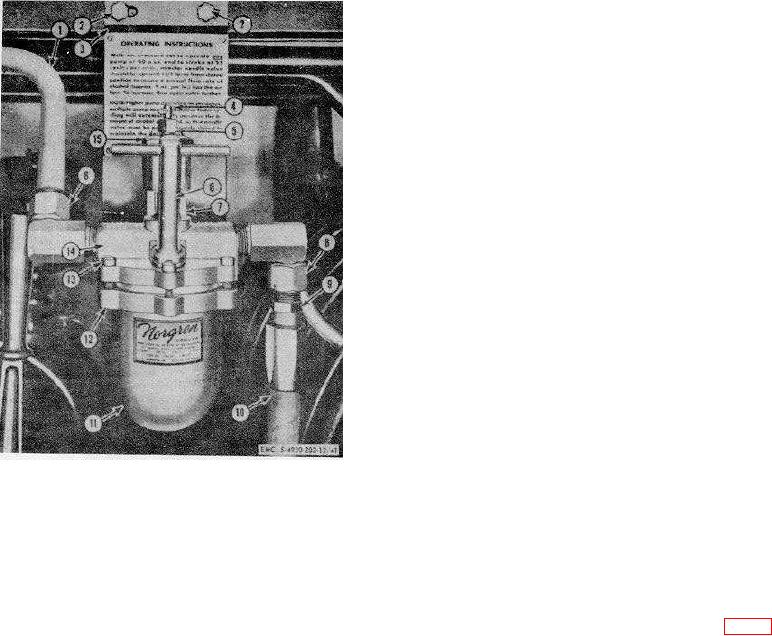
(4)
Remove the filler plug assembly (6) from the
top assembly.
(5) Remov e the needle valve (4) and gland from
the top assembly by removing the packing
nut (5) and top plug (15).
c. Cleaning, Inspection, and Repair.
(1) Clean all parts with an approved cleaning
solv ent.
(2) Inspect the sight glass for cracks.
(3) Inspect all fittings and threaded connections
for damage. Replace defective parts.
(4) Inspect the bowl for dents or holes. Replace
a defective bowl. Replace bowl gasket.
(5) Inspect the needle valve. Replace if dam-
aged.
d. Reassembly.
(1) Install the needle valve (4) and gland in the
top assembly (14) and secure with top plug
(15) and packing nut (5).
(2) Install the filter plug assembly (6) on the top
assembly (14).
(3) Install the bowl gasket on the bowl (11).
Place the bowl in position on the top
assembly, and secure by installing the ring
clamp (12) and six screws (13).
1
Air line, alcohol dispenser-to-regulator
(4) Install the two adapters (8), one to each side
2
Cap screws, 1/4-20 x 1/2 in. lg (2 rqr)
of the top assembly.
3
Mounting bracket
4
Needle valve
e. Installation.
5
Packing nut
(1) Install the alcohol dispenser and mounting
6
Filler plug assembly
bracket (3) on the lubricator frame and
7
Sight feed glass
8
Adapter, 90' union
secure with the two cap screws (2).
9
Air hose connection to alcohol dispenser
(2) Connect the air line (1) and air hose (10) to
10
Air hose
the alcohol dispenser adapters (8).
11
Bowl
12
Ring clamp
(3) Open the master control valve (2, fig. 8) on
13
Screws, 3/16-20 x 3/4 in. Ig (6 rqr)
the air receiver tank (10).
14
Top assembly
(4) Inspect the alcohol dispenser for leaks
15
Plug, top
during operation.
Figure 41. Alcohol dispenser.
86

