TM 5-4310-360-14
Air Cleaner and Oil Filler - continued.
3-9.
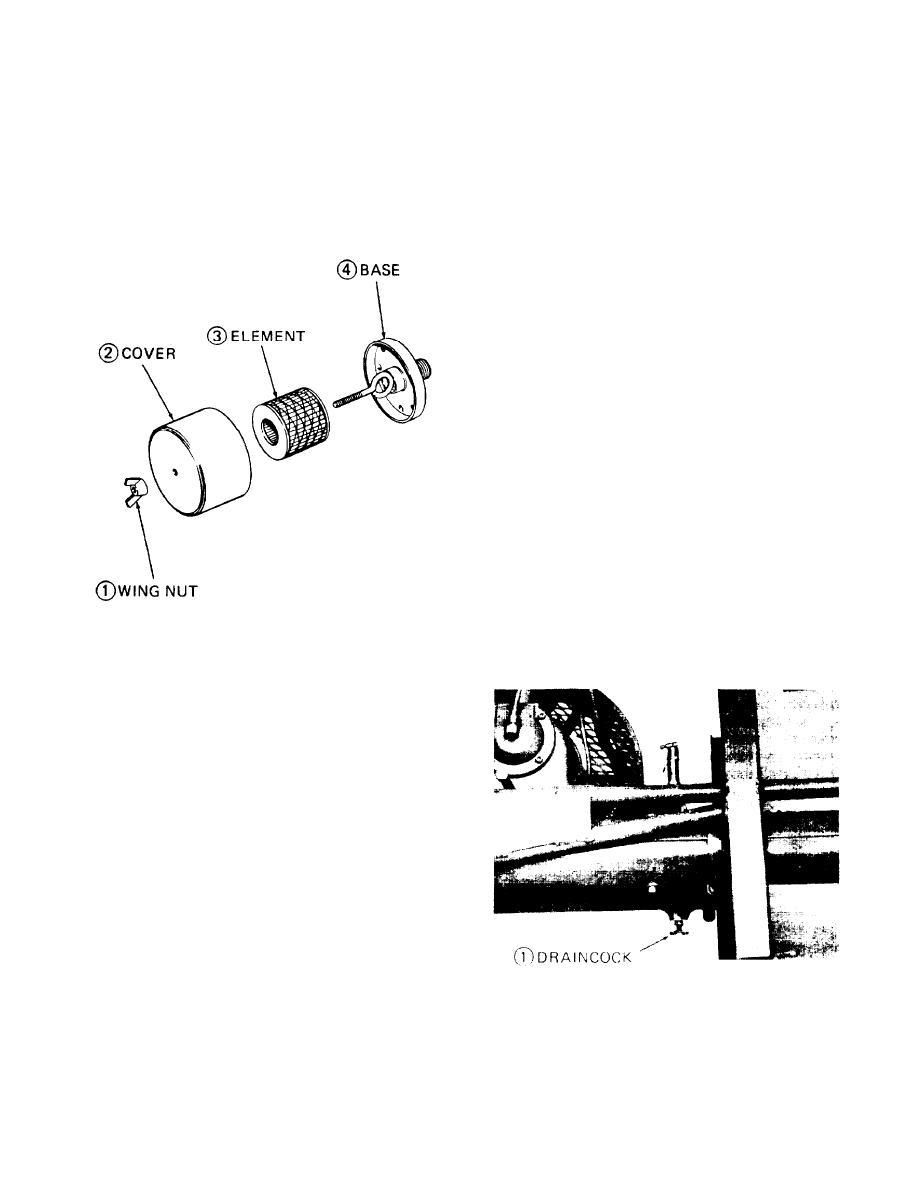
Clean filter element (3) by blowing out
(2)
with air or washing with cleaning
solvent, P-D-680.
Disassembly.
b.
Inspect the air cleaner for cracks,
(1)
Remove wing nut (1) and cover (2).
(3)
dents, breaks, and other damage.
(2)
Remove element (3) from the base (4)
Replace defective filter element (3) or
(4)
the complete cleaner assembly if
required.
Inspect the oil level gage for cracks
(5)
or breaks.
Replace the oil level gage if defective.
(6)
d.
Reassembly and Installation.
Install the filter element (3) and
(1)
cover (2) into base (4) and fastening
with wing nut (1).
Screw the air cleaner back into the air
(2)
compressor air inlet.
Install the oil level gage in the com-
(3)
pressor crankcase.
3-10. Air Receiver Tank.
Open draincock (1) daily to remove
a.
moisture from the air receiver tank.
C.
Cleaning and Inspection.
WARNING: Drycleaning solvent, P-D-680,
used to clean parts is potentially dangerous
to personnel and property. Avoid repeated
and prolonged skin contact by wearing
rubber or solvent impermeable gloves when
handling the solvent or material wet with
drycleaning solvent. Wash hands immedi-
ately after exposure with soap and water
and use a lanolin based skin cream to
prevent skin drying. Do not use near open
flame or excessive heat. Flash point of
solvent is 100F (38C). Ensure that venti-
lation adequate to reduce solvent vapor
concentrations below acceptable threshold
limit values is provided.
WARNING: When using compressed air for
blowing, air hose pressure must not exceed
30 psig, and individuals must wear eye
b.
Keep all fittings connected to the air
protective equipment.
receiver tank tight. Check for leaks with
soapy water with pressure in air receiver.
Check welds on air receiver tank with
(1)
Clean the air cleaner with cleaning
soapy water.
solvent, P-D-680, and dry thoroughly.
3-11


