f. Screw the fuel valve seat (19) and its fiber washer (20) into place, with the special valve seat wrench (par. 179).
Then place the fuel valve needle into the fuel valve seat with the knob end of the needle up.
g. Hold the free end of the float (15) and engage the knob end of the needle (19) with the slotted end of the float
lever. Lift the float and needle and slip the float axle (17) through the float lever; then lower the axle into the slots and the
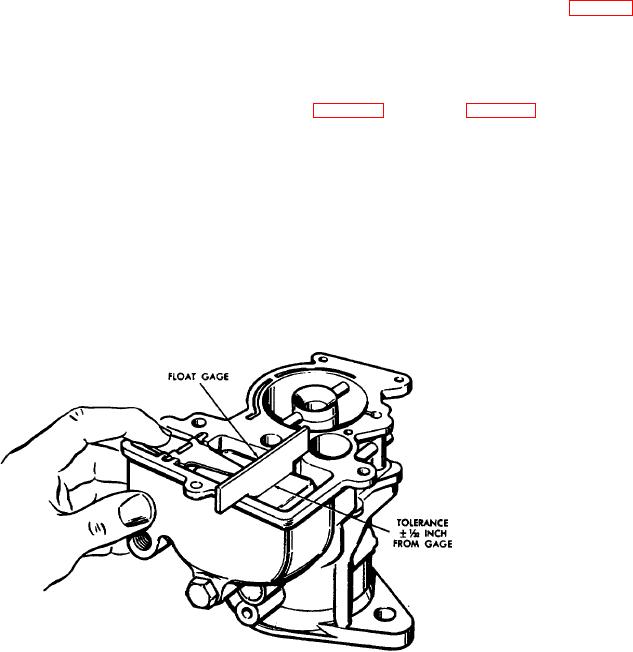
casting. Press down firmly on the float lever directly over the fuel valve and check the float for correct level. This float
level can be checked with the special Zenith carburetor float depth gage (par. 179) as shown in figure 74. A tolerance of
plus or minus 1/32 inch from the gage setting is permitted. Install the axle retainer plugs (16) with a flat end punch. Allow
approximately 1/64 inch tolerance above the machined surface.
h. Insert the well seal washer (10) down into its opening in the fuel bowl. Then install the check valve with jet (47)
open end down, into the same opening above the seal washer. The valve will extend approximately 1/64 inch above the
surface of the bowl casting.
i. Install the pump (49), guide (50), spacer (51), and pump spring (52), in that order, into the pump cylinder. Position
the bowl-to-intake gasket (12) on the fuel bowl. Then insert the vent and idle well (11) into the well on top of the bowl
gasket, and put the well seal washer (10) in place on top of the idle jet.
j. Place the air intake body (5) upright on a bench, with the bowl cover end toward the right. Hold the choke plate (6)
with
Figure 74. Checking carburetor float level.
174

