1.
Body assembly
10.
Shaft L
2.
Stator wedge kit
11.
Conduit box assembly
3.
Bracket, front
12.
Bearing
4.
Bracket, rear
13.
Spring, loading
5.
Rotor assembly
14.
Flinger, external
6.
Bolt, stud
15.
Fan, external
7.
Bearing
16.
Nut
8.
Flinger, external
17.
Cover, fan
9.
Key
18.
Fan
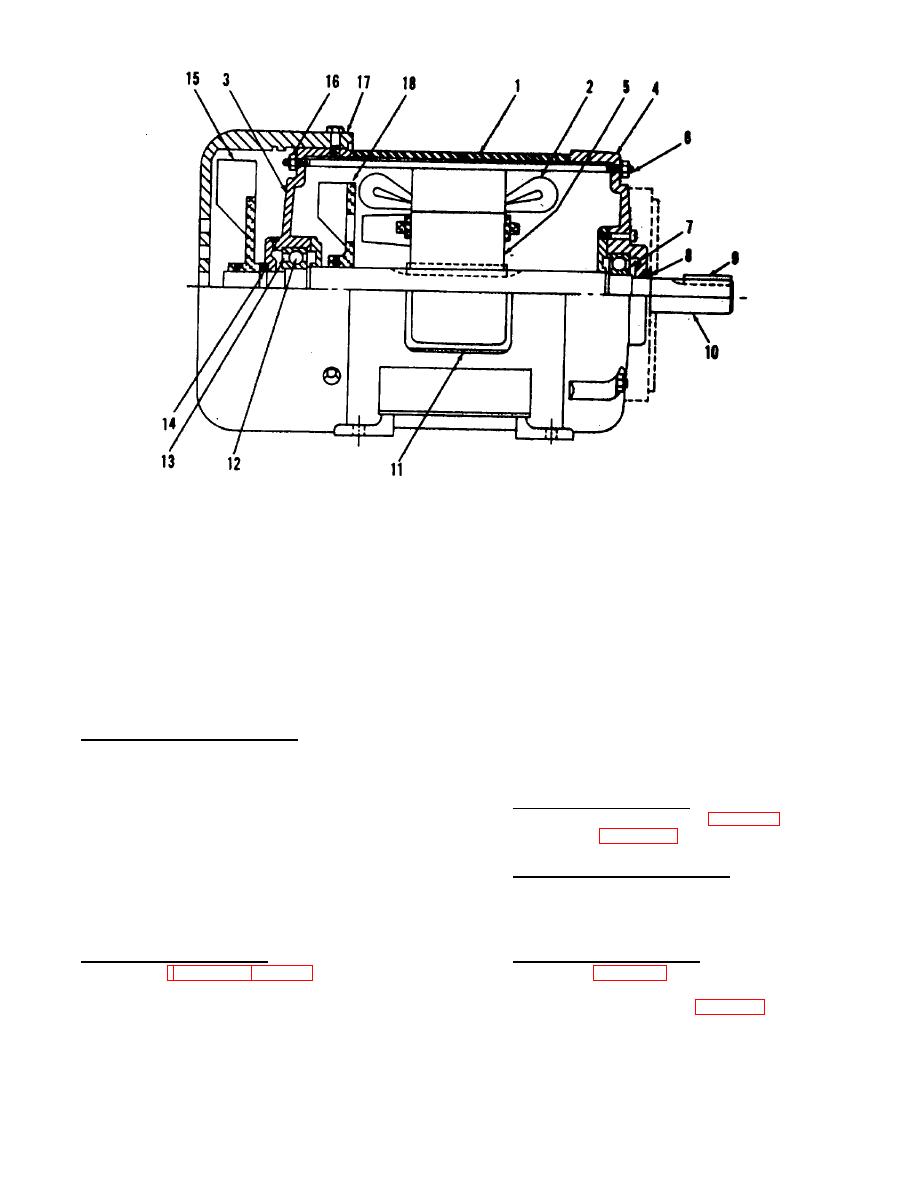
Figure 19. Electric motor assembly.
2. Cleaning, Inspection, and Repair.
2. Press bearing cup in the unloader housing.
a. Clean all parts in an approved cleaning solvent
3. Install new gasket on the unloader homing.
and dry thoroughly.
b. Inspect the crankshaft for cracks, scores, and
C. ELECTRIC MOTOR
distortion Measure the crankshaft journals for
1. Removal and Disassembly.
a. Remove the electric motor, Section VIII, B1.
wear. If the connecting rod journals measure
b. Refer to figure 19 and disassemble electric
0.0005
inch
out-of-round,
replace
the.
motor.
crankshaft.
2. Cleaning, Inspection, and Repair.
c. Inspect the crankshaft bearings for rough, pitted,
a. Clean all parts with an approved cleaning solvent
or scored rollers. Replace a defective hearing.
and dry thoroughly.
d. Inspect the crankcase for cracks, breaks or
b. Inspect all parts for wear or damage and replace
other defects.
Replace the crankcase if
worn defective part
defective.
3. Reassembly and Installation.
3. Reassembly and Installation.,
a. Refer to figures 17 and 18 reassemble and
a. Refer to figure 19 and reassemble the electric
install cry shaft in crankcase using the following
motor.
procedures:
b. Install the electric motor, Section VIII, B2.
1.
Always install new oil seal in crankcase.
20


