
TM 54310-352-14
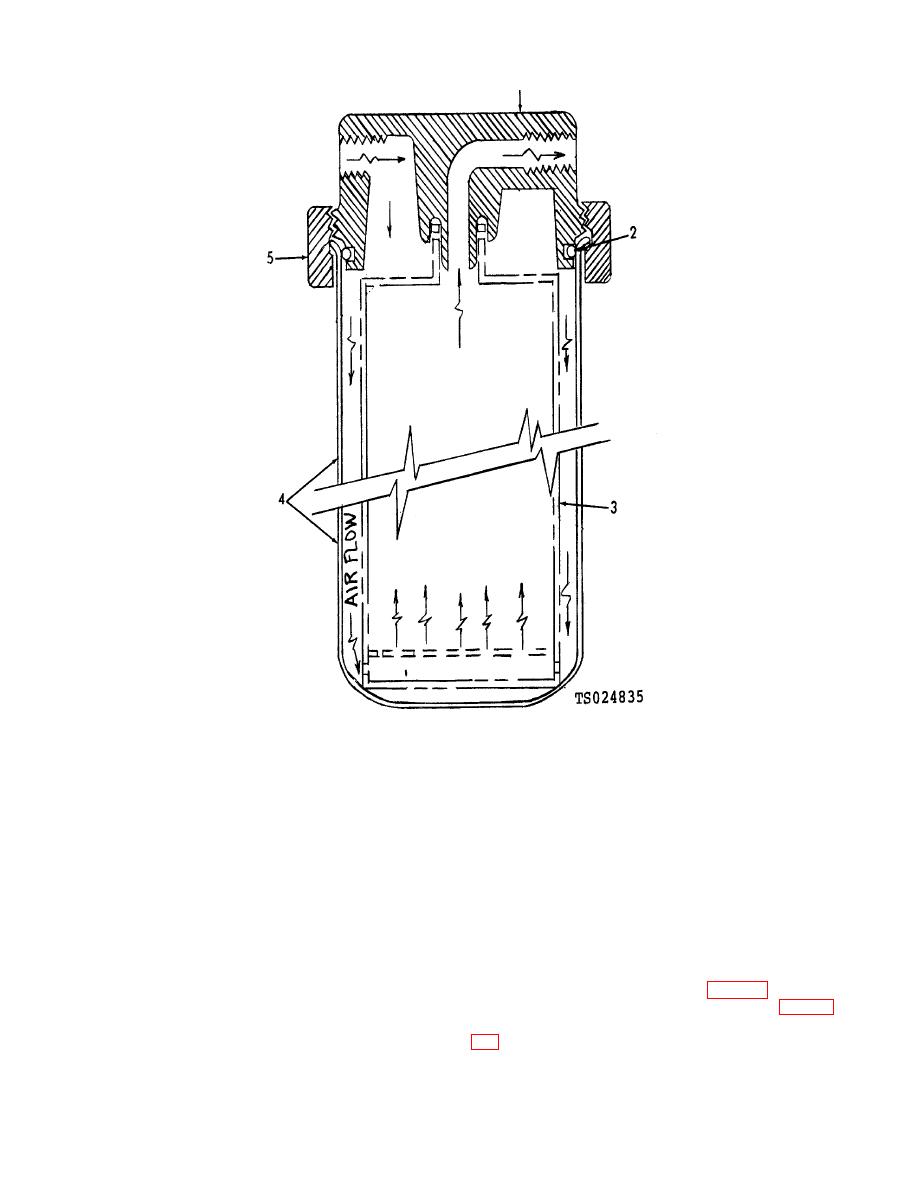
1. Head 2. Preformed packing 3. Filter Cartridge 4. Vessel 5. Locking nut
Figure 3-3. Dehydrator
(2) Inspect the filter cartridge (3) entering air
ing nut (5).
holes (at bottom of cartridge) for stoppage. Inspect the
(7) Inspect the remaining dehydrator in a similar
preformed packing (2) for deformation by excess com-
manner.
pression. Replace a defective cartridge or packing.
NOTE
(3) Check the interior molecular sieve of the
Dehydrator filter cartridges must be re-
cartridge for free flow of air, by blowing through top of
placed after every six (6) operating hours.
cartridge lightly. Replace a defective cartridge.
(8) Replace filter cartridges every six (6) oper-
CAUTION
ating hours, or sooner when defective, as described in
When installing vessel (4) to head (1),
steps (1) through (3) above.
tighten locking nut (5) just enough to
c. Outlet Air Filter Inspection and Service.
compress the preformed packing (2). Ex-
(1) With all power off, use a spanner wrench
cess torque will deform the packing.
and loosen bowl locking nut (1, fig. 3-4), then loosen
(4) Install cartridge (3) in vessel (4).
clamp retaining tube to outlet filter draincock (fig. 1-2).
(5) Position preformed packing (2).
(2) Loosen screws (3) and remove bowl (2, fig.
(6) Install vessel in head (1) and tighten lock-
3-9
