TM 5-4310-362-14
PISTONS, CRANKSHAFT AND CENTRIFUGAL UNLOADER MODEL 20-904 (Cont)
LOCATION/ITEM
ACTION
REMARKS
7.
Connecting rod to
a. Check fit.
crankshaft
(1) Tap cap to make sure
that rod is making
contact.
(2) Tighten both connecting
rod screws and both
lockwashers to 8 ft-lbs.
(3) Combined piston and con-
necting rod should turn
slowly on the crankshaft
of their own weight.
b. If connecting rod to crank-
shaft fit is loose, replace con-
necting rod.
8.
Oil seal
a. Inspect for cuts or damage.
b. Replace if damaged.
8-17.
ASSEMBLY
1.
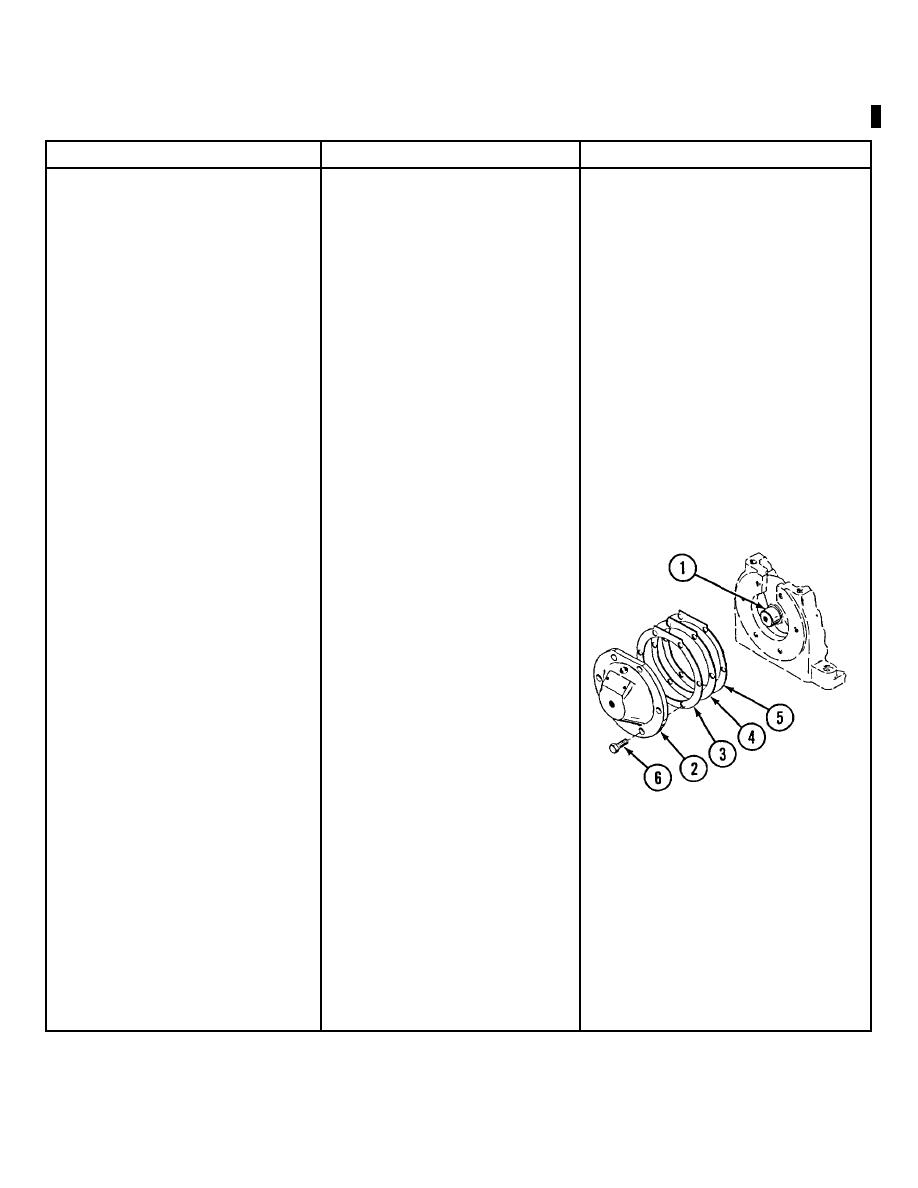
Crankshaft assembly (1)
Install in base.
2.
End cover (2) and
a. Install with six screws (6).
gaskets (3, 4 and 5)
b. Crankshaft should spin in
bearings without end play.
c. Check that oil feeder ring
turns freely within guide lugs
in base.
d. Add gaskets if crankshaft
Too many gaskets will give the crank-
can't be spun.
shaft end play and cause noisy opera-
tion. Too few gaskets will cause the
crankshaft to bind and bearings to
wear out.
e. Remove gaskets to eliminate
end play.
3.
Crankshaft
a. Remove from base.
b. Clamp in soft jaw vise.
Change 1 8-21


