TM 5-4310-335-14
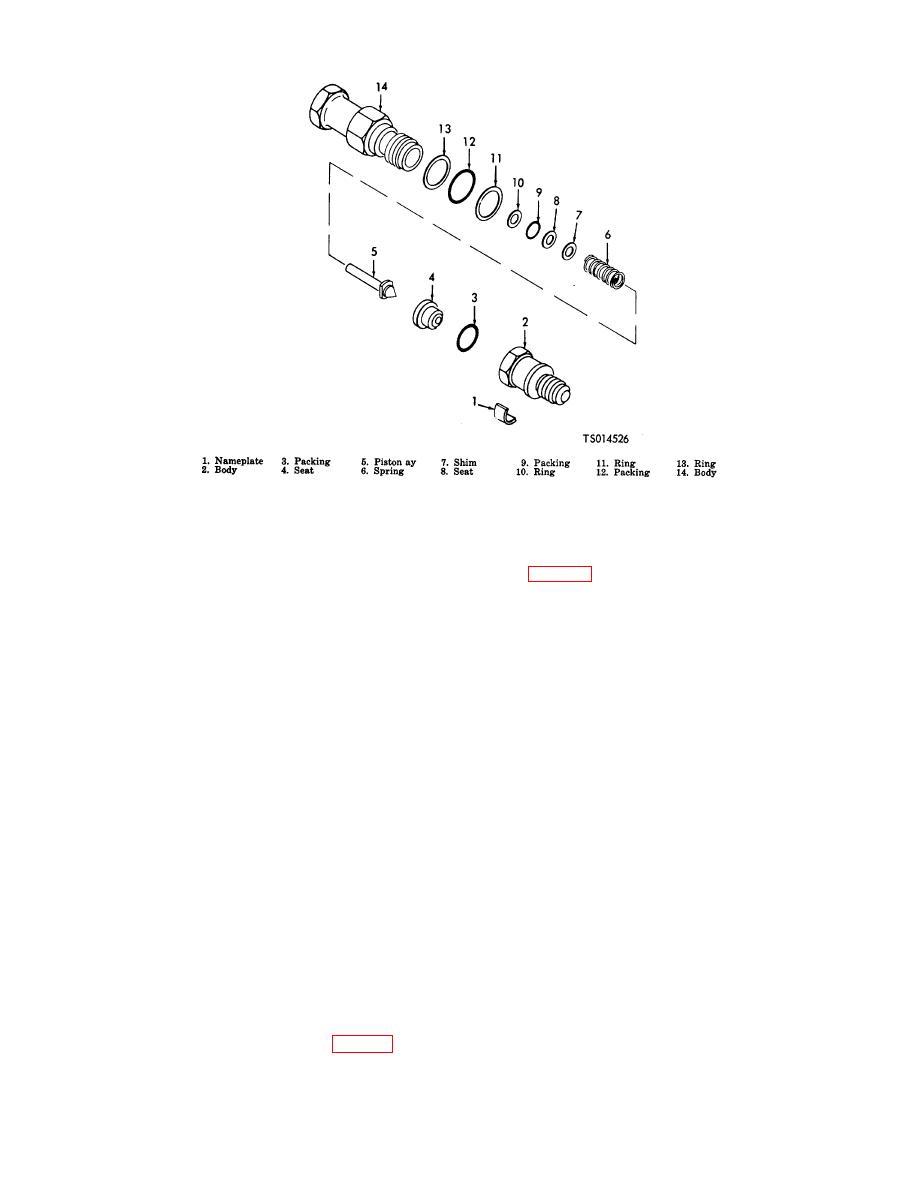
Figure 6-9. Back Pressure Valve Assembly
shim (6), spring retainer (7) and helical spring (8).
(b)
Remove plain hexagon nuts (9), lock- washers (10), flatwasher (11), machine screws (12),
flatwashers (13), shims (14), control valve (15, fig. 6-12) and bracket (16).
(c)
Remove nylon pan head screw (17), setscrew (18), actuator knob (19), stop nut (20), jam
nut (21) and cap (22) leaving body (23).
NOTE
Do not disassemble cap (22) from body (23) unless replacement of either part is
necessary.
WARNING
Dry cleaning solvent, P-D-680, used to clean parts is potentially dangerous to
personnel and property. Do not use near open flame or excessive heat. Flash
point of solvent is 100 - 138 . (38 to 59 ).
F
F
C
C
b. Cleaning. Clean metallic parts of the valves using cleaning solvent, Fed. Spec. P-D-680, and dry
thoroughly using filtered compressed air.
c. Inspection.
(1) Inspect packing for wear and deterioration.
(2) Inspect back up rings, washers, brackets, clamp, and spring for warpage and
corrosion.
(3) Inspect timer gear for cracked, chipped or broken teeth.
(4) Repair any damage or replace parts which obstruct moving parts or could cause
damage to the equipment.
d. Repair.
(1) Replace preformed packing.
(2) Replace damaged, defective or missing parts.
e. Assembly. Detailed reassembly procedures and testing requirements are listed where warranted.
(1) Back Pressure Valve. (fig. 6-9).
(a) Assemble the valve in the reverse order of the disassembly procedure, observing the
following additional instructions.
6-17


