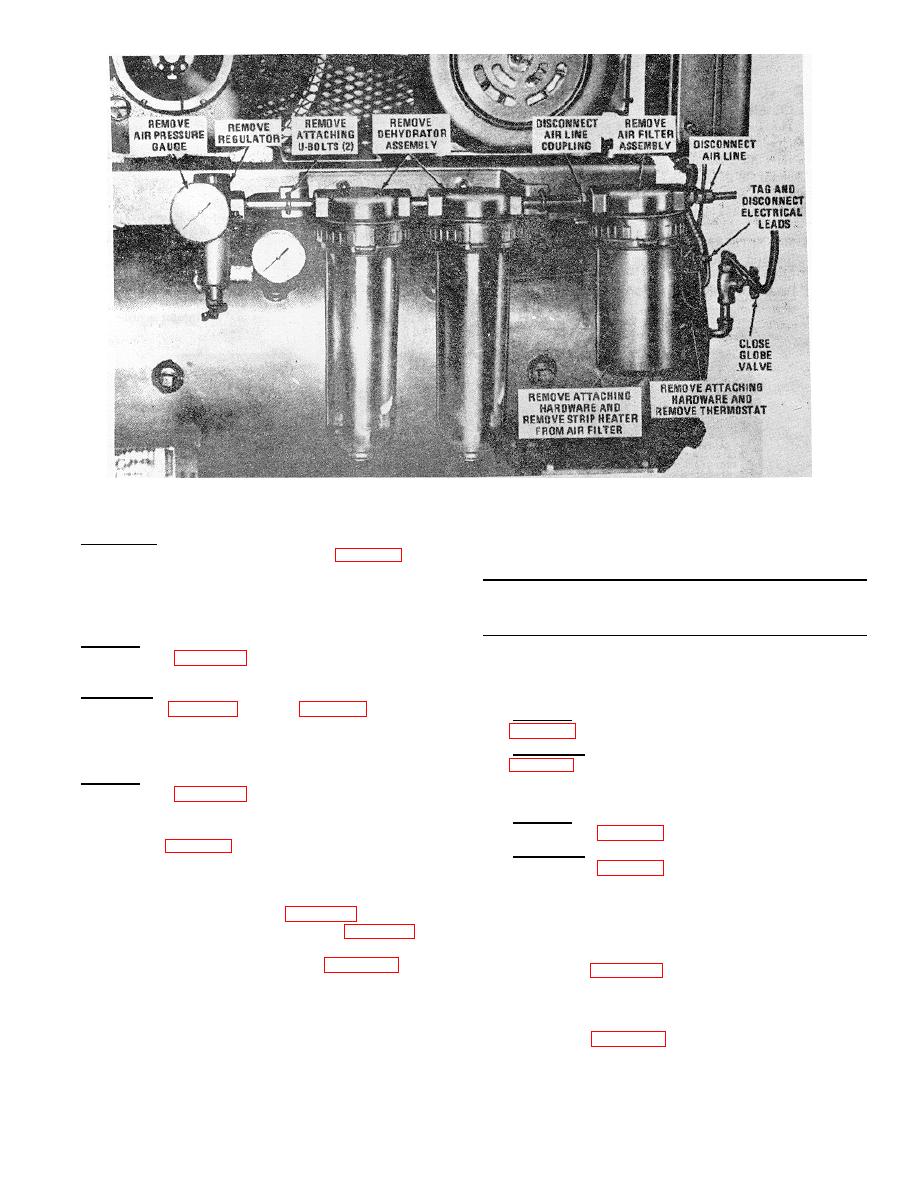
Figure 13. Air filter, strip heater, thermostat hydrator and regulator, removal and installation
2. Installation.
and flywheel; when the top lines up with the bottom of the
a. Install the air filter as instructed on figure 13.
belt next to it the tension is correct.
b. Install the strip heater and thermostat as
instructed in C above.
CAUTION: Do not adjust the V-belts too tightly as this
will overload the motor bearings. Also check and be
C. DEHYDRATOR ASSEMBLY
sure pulley alignment is maintained.
1. Removal. Remove the dehydrator assemblies as
instructed on figure 13. Replace defective parts as
c.
Tighten motor mounting bolts securely.
necessary.
2. Installation. Install the dehydrator assemblies as
F. AIR INTAKE MUFFLER
instructed on figure 13. Refer to Section II D, 2 for
1. Removal. Remove intake muffler u instructed on
installation of desiccant.
2. Installation. Install intake muffler as instructed on
D. REGUJLATOR ASSEMBLY
1. Removal.
Remove the regulator assembly as
instructed on figure 13. Replace defective parts as
G. INTAKE AND EXHAUST MANIFOLDS
necessary.
2.
Installation.
Install the regulator assembly as
instructed on figure 14.
instructed on figure 13.
instructed on figure 14.
E. V-BELTS
1. Removal.
H. INTAKE AND EXHAUST VALVES
a. Remove V-belt drive guard, figure 14.
1. Removal and Disassembly.
b. Remove the V-belts as instructed on figure 14.
2. Installation.
described above.
a. Install V-belts as instructed on figure 14, and
b. Refer to figure 15 and remove and disassemble
adjust tension as described below.
intake and exhaust valves as shown. Replace
b. Install V.-belt drive guard.
damaged or defective parts as necessary.
3. Adjustment.
2. Reassembly and Installation.
a. Move the motor away from the compressor until
a. Refer to figure 15' and reassemble and install
there is tension on the V-belts.
intake and exhaust valves as shown.
b. Depress one of the V-belts midway between the
pulley
14


