TM 5-4310-227-15
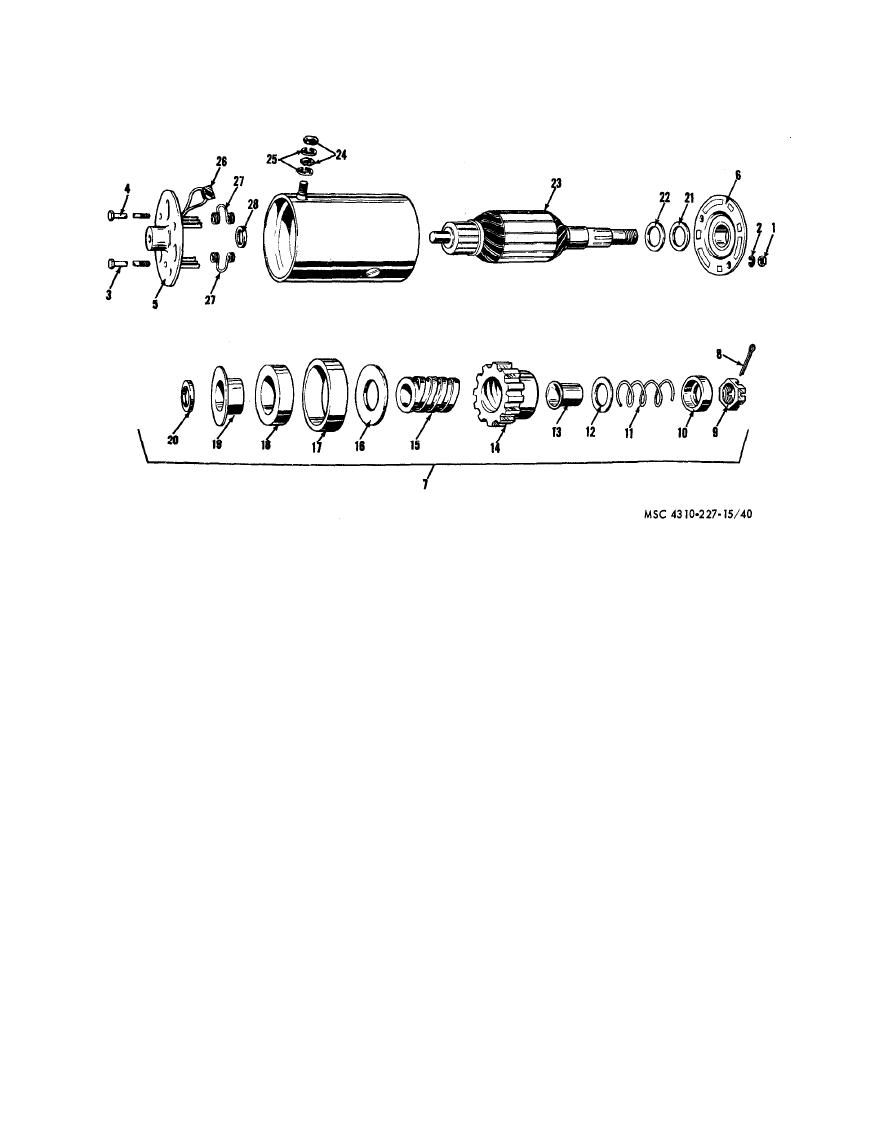
21 Washer, thrust
11 Spring
1
Nut
22 Washer, thrust
2
Washer, lock
12 Pinion washer
23 Armature
13 Sleeve
3
Bolt
24 Nut
14 Pinion
4
Bolt
25 Washer, lock
Commutator and head assemibly 15 Shaft
5
26 Brush
16 Washer, thrust
6
Drive end head assembly
27 Spring
17 Cup, cushion
7
Drive assembly
28 Washer, thrust
18 Cushion
Pin, cotter
8
19 Washer, thrust cup
9
Nut
20 Spacer
10
Pinion stop
(5) Test the armature for grounds with a
(4) Test the armature for open circuits
test lamp circuit. Test Between the
with a growler. Position the armature
armature shaft or core and one of the
o n the growler and energize the
commutator bars. Repeat the test at
growler. With the test probes connect-
t w o or more locations around the
ed to an AC voltmeter, select a pair
commutator to preclude the possibility
o f commutator bars which give a
of testing from an isolated bar. If
readable indication on the voltmeter.
t h e lamps light, the armature is
Maintaining this relation between the
grounded. Replace a defective arma-
test probe position the growler, turn
ture.
the armature one slot at a time until
(6) Inspect the field windings housing,
all coils are tested. The voltmeter
e n d b e l l , drive housing, and pole
readings should be nearly uniform. If
shoes for cracks, breaks, or other dam-
the armature has been proven free of
age. Replace as necessary.
shorts (see (3) above), a low or zero
(7) Inspect a l l hardware for cracks,
reading indicates an open circuit, Re-
breaks, or damaged threads. Replace
defective parts.
place a defective armature.
4-11


