(2) Inspect the fuel line for cracks, split,
stretched, or frayed ends. Replace the
fuel line if it is defective.
c. Installation.
(1) Install the elbow (18) in the fuel tank
and one end of the fuel line (20) in the
elbow, tighten the nut (19).
(2) Install the elbow (3, fig. 13) in the
fuel strainer cover (4) and install the
other end of the fuel line in the elbow.
Tighten the nut (2).
(3) Fill the fuel tank (par, 12).
a. Removal.
(1) Drain the fuel tank (par. 30).
(2) Disconnect the fuel line at the fuel
strainer cover (par. 75).
(3) Remove the elbow and the fuel
strainer assembly from the engine.
b. Diassembly.
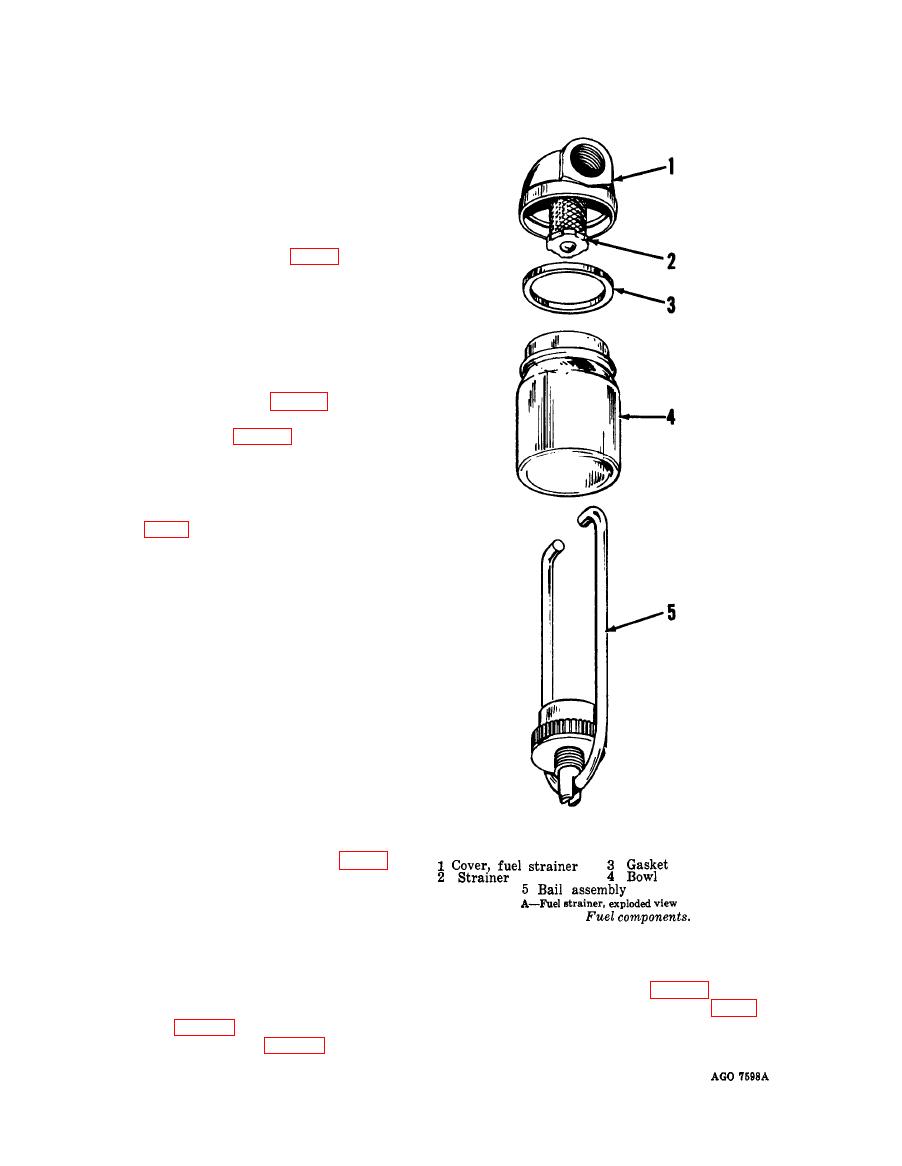
(1) Loosen the nut on the bail assembly (5,
A, fig. 17) and remove the bail as-
sembly.
(2) Remove the bowl (4), gasket (3), and
strainer (2) from the cover (1).
c. Cleaning, Inspection, and Repair.
(1) Clean all parts with an approved
cleaning solvent. Blow out the fuel
strainer cover with compressed air.
(2) Inspect all threaded parts for worn or
damaged threads. Inspect the fuel
strainer for damage. Inspect the fuel
strainer cover for cracks. Inspect the
bail for bends. Replace all defective
parts.
d. Reassembly.
(1) Install the nipple in the fuel tank and
install the elbow in the fuel strainer
EMC 4310-241-15/17
cover.
(2) Install the strainer (2, A, fig. 17),
gasket (3), and bowl (4) on the fuel
strainer cover (1) and secure with the
bail assembly (5).
e. Installation.
77. Fuel Tank
(1) Install the fuel strainer cover, bowl,
a. Removal.
and bail assembly as an assembly and
(1) Remove the fuel line (par. 75).
the elbow on the nipple in the engine.
(2) Remove the two U-bolts (3, B. fig. 17)
(2) Install the fuel line at the fuel strainer
and nuts that secure the fuel tank (8)
cover (par. 75).
to the hand truck. Remove the tank.
(3) Fill the fuel tank (par. 12).


