TM-5-4310-389-14
c.
Check the joint surface for the cylinder on the crankcase.
d.
The cylinder joint surface must be level and free from indentations. If necessary, dismantle the adjacent cylinder
and baffle plate.
e.
Adhere to cylinder by means of grease at least one shim of 0.008 inch (0.2 mm) thickness.
f.
Place the piston on two wooden slats. Oil the working face of the cylinder and the piston. Position the rings so
that their gaps are equally spaced around the piston.
g.
Mount and tension the piston ring compressor No. 003-0430.
h.
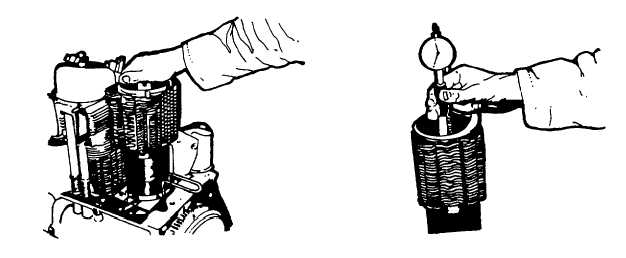
Install the cylinder with the cutouts facing the push rod bores (figure 4-15).
i.
Bring the cylinder into alignment with the adjacent cylinders.
j.
Inspect cylinder for defects. If necessary, replace complete with piston.
k.
Set bore gauge (figure 4-16) to the basic standard or oversize bore (see specification data in table 4-4).
1.
Measure cylinder bore at levels 1 to 4 of engine centerline as well as crossline b (figure 4-17).
m.
Compare readings with the specification data in table 4-4. if the wear limits are reached, replace the parts
concerned. Pistons and cylinders are available in two oversizes.
n.
Check that cylinder top and bottom joint faces are flat.
Follow on maintenance: Replace cylinder heads (paragraph 4-15).
Figure 4-15. Correct Installation of Cylinder
Figure 4-16. Setting the Bore Gauge
4-47


