TM 5-4310-393-14
b.
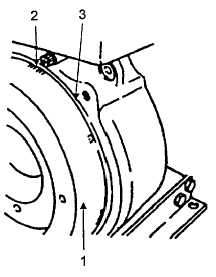
Slowly rotate flywheel (1) in a
clockwise direction when facing flywheel, until dial gauge
indicates the delivery lift measurement. See note above.
c.
Stop flywheel at position indicated in
step 2.
WARNING
DEATH OR SERIOUS INJURY COULD
OCCUR IF FUEL IS NOT HANDLED
CAREFULLY. USE IN A WELL
VENTILATED AREA AWAY FROM
OPEN FLAME, ARCING EQUIPMENT,
IGNITION SOURCES, HEATERS, OR
EXCESSIVE HEAT. ENGINE MUST
BE
TURNED
OFF
AND
COOL
BEFORE REFUELING. ALWAYS
STORE FUEL IN PROPER, MARKED
CONTAINERS. DO NOT SMOKE.
d.
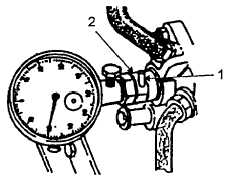
At this point, fuel should emerge
again from the spill pipe (Figure 5-10, Item 1) of spill
device (2)
NOTE
If fuel does not emerge, turn the extra
fuel device. If the results are not
obtained, turn the extra fuel device in
the opposite direction.
e.
Loosen extra fuel button jam nut
(Figure 5-11, Item 2) with 30 mm socket wrench,
66833500.
f.
Using special wrench 60600000,
slightly rotate extra fuel device (1) until fuel starts
dripping.
FIGURE 5-9. TIMING MARKS
FIGURE 5-10. CHECKING DELIVERY LIFT
g.
Tighten extra fuel button jam nut (2)
h.
Block fuel hose (from fuel tank) using fuel shutoff clamp.
I.
Remove dial gauge, with spill device attached.
j.
Remove delivery valve body (Figure 5-12, Item 1) and copper washer (2) from spill device.
k.
Install filling piece with three shims (3) in delivery valve holder (4).
I.
Insert spring (5) in delivery valve holder (4).
m.
Insert copper washer (2) in delivery valve holder (4)
n.
Insert delivery valve (6) in valve body (1)
o.
Insert delivery valve (6), and valve body (1) into delivery valve holder (4)
5-13


